Tuesday, July 23, 2013

Spicy Watermelon Gezpacho

      Summertime . . . and the livin is easy.  I lie, it's not, it's tourist season here in Charleston, that means, busy, busy, busy for those of us in the hospitality industry.  It's ok though, because summer is full of many of my favorite foods.
There are of course peaches, strawberries, squash, lovely corn, sweet onions and a plethora of peppers.  Tomatoes are high on my list of the amazing things I love about summer.  In fact I made an awesome tomato pie last night.  (It's a food network recipe, so check out the link)  The thing that I truly can't resist about summer are the melons.  They are sweet and fragrant and oh so lovely.
      I have been getting in beautiful small sweet seedless watermelon from GrowFood Carolina  that have simply amazing flavor-- diced it up for a salad and took a piece to my General Manager to try.  Before eating it he asks what I did to it:  Did I pickle it? (yes pickled melon is awesome) or maybe I salted it, or tossed it in a light vinaigrette?  Nope-  I just diced it up and brought over a piece of heaven.  It's hard to improve upon, I dare say, but when you have simply had your fill this is a great little recipe to try.
      This gazpacho is fun because combines a lot of these wonderful flavors you get in the summer.  It takes the sweetness of the watermelon and puts it in contrast with the heat of a few nice jalapenos (maybe you've been growing these in your garden) and then for a little added surprise at the end I use Blenheim's, a local spicy ginger ale to add a little more kick and to give it a little sparkle on your tongue.  And because it is just packed with flavor I will usually just serve a small bit of it to wet the appetite, maybe even add some spiced rum to make it into a delicious summer shot for your garden party!
      The method on this is pretty simple, really it's all about picking the right ingredients- go to your local farmer's market and remember as far as flavor goes, bigger isn't always better, there is a lot more sweetness packed into those small melons than the big boys.  So basically you are going to combine everything and puree.  If you have an immersion blender those work great, and you can just do it all at once in a big bowl, otherwise you will have to do smaller batches in the blender then mix it all together at the end.
2 lbs watermelon-rind removed and roughly chopped (one small one should do the trick)
1 quart strawberries, stems removed
3 cucumbers-peeled and seeded
2  jalapenos (I usually remove the seeds from one and leave them in the other, gives the perfect amount of heat and flavor
1 small red onion, sliced
1/4 cup chopped cilantro
1/4 cup chopped mint
1 TBS honey
1/4 cup champagne vinegar
1 TBS salt
1 tsp black pepper
      So puree it, chill it and serve it.  I like putting it into glasses and finishing the whole thing with a 2 to 1 ratio, two parts gezpacho and one part gingerale.   This, you guys, is going to blow your minds!


Thursday, June 20, 2013

New Orleans

      I am currently on a vacation, which has afforded me the time to write again after a long absence, though hopefully I will be able to more frequently with my new schedule.  I am in New Orleans, staying in the French Quarter with my sister.  She is here for a business meeting, though which leaves me to my own devices most of the day.  So after sleeping in as long as I could I hit the streets for breakfast.  I did not google any restaurants, or use tripadvisor nor yelp or urbanspoon:  I simply walked.  I wandered for about an hour pressing my head to darkened windows of restaurants only open for dinner, reading menus, watching for the crowded dining rooms that indicates some good grub.  Sometimes as I walked I would spot someone with the right look: the shoes, the pants, the walk, you can always tell-- another cook.  These people I would see and would wonder if they spotted me too.  I don't have my clogs on, but my arms carry the battle scars of many hot saute pans or forgotten food in the oven.  I stop a few of them- because these guys are the ones who know where the real good food is. 
      One of these such gentleman points me to the IHOP, because I'm obviously a tourist, and wouldn't know real food if it hit me in the face, but when I ask for a local place he points me to The Ruby Slipper- a cafe with some nice home town charm.  I had a corned beef hash benedict over a biscuit instead of an english muffin.  (sorry I didn't get a picture, I was hungry!)
      Day two of my trip started out much the same, though in a different section of town.  Aimless wondering took me all over the financial district and I saw several great places for lunch, but nothing that really jumped out at me for breakfast.  After about an hour and a half, about to give up and just wait another 45 min until the lunch places opened up the rain started. 
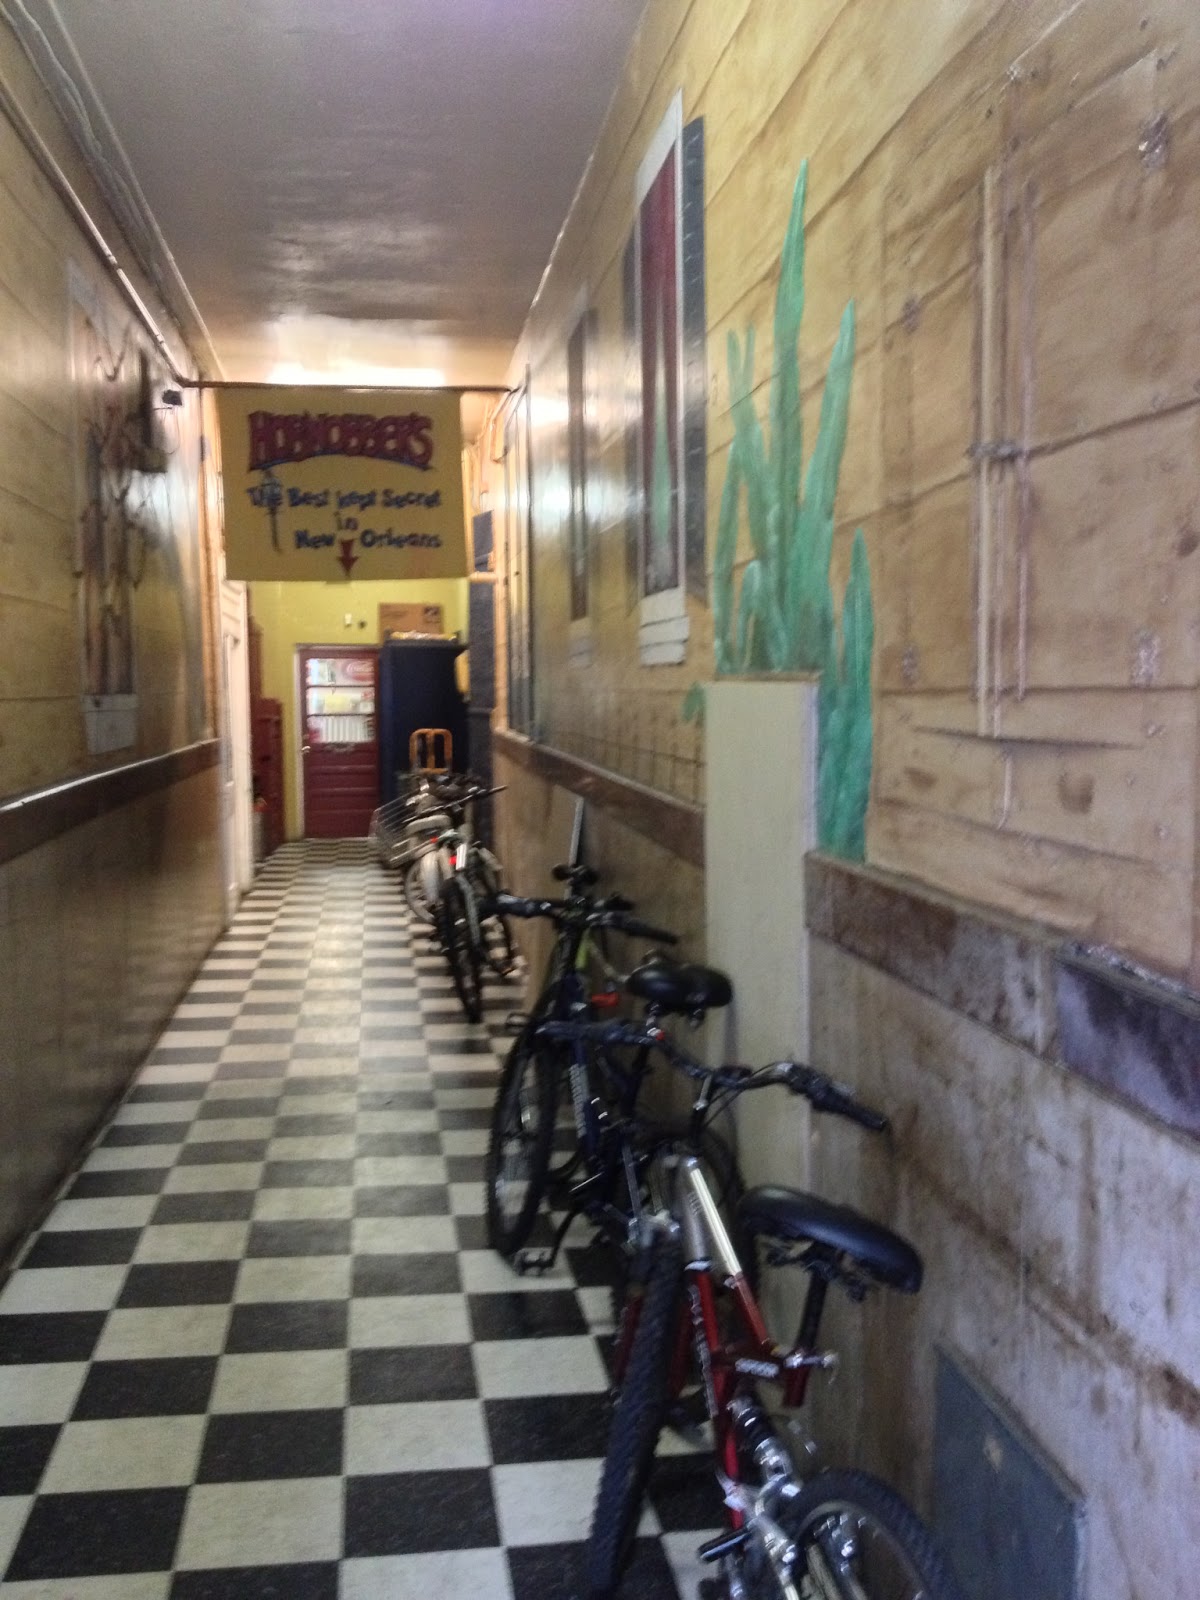
I found myself in a little alley/hallway to get out of the rain when I realized that there was a restaurant back there through a screen door at the end of that hallway "The best kept secret in New Orleans"  Hobnobbers was the locals hole in the wall place I had been looking for.  After a warm greeting from an older gentleman I was pointed to a counter behind which two older ladies were taking orders and cooking up a fabulous breakfast.  I just wanted something simple- the hash brown plate would do. When it's ready it comes out on a paper plate with a beautiful golden brown biscuit, delicious potatoes and a perfectly over easy egg.  It was lovely: Sitting at my little corner table listening to the day's gossip and the happenings of a town that's not home with a plate of delicious food and my book, avoiding the rain. 

Monday, March 25, 2013

Roasted Corn and Jicima Salad

       Tired of the same old vegetables in your salads, and on your table? How about try something new! For those of you that have never had Jicima it is a root that is crunchy like an apple, but not sweet, it has a finish similar to a watercress that has just a little bit of bite. You can cook it, but I prefer to use it for crudite or in in a salad.  I love these type of salads this time of year because it just makes me feel like spring is in the air!  And what better way to celebrate spring, and this lovely vegetable than with the Latin American flavors that we find where this delicious root comes from.  Let's Begin with the dressing shall we?

Jalapeno Lime Viniagrette
1 Jalapeno- Roasted-  put in a pan under the broiler turning on a regular basis to char the outside.  Once it is charred put in a container covered to let it finish cooking itself while you are getting the other ingredients together.  Next you will need
Zest and Juice of 1 Lime
1 Tsp Shallot, minced
1 TBS rice wine vinegar
1 TBS honey
1/4 tsp ground cumin
pinch of salt and pepper
puree all of this (including the jalapeno, seed it if you don't want the heat) together then slowly  drizzle in
1 cup salad oil to make an emulsified dressing

For the salad itself you are going to need 
1 Jicima root- Peel it and then cut it into a fat matchstick shape about 1/4 inch square by 1 1/2 inches long
1 ear of corn,  roasted then the kernels removed- you can roast this similarly to the jalapeno, just rub it down with a little bit of oil salt and pepper then put it in the oven under the broiler, turn it as it begins to brown just a bit and then let it cool and cut the kernels off the cob. 
1/4 red onion, julienne
1 roasted red pepper, peeled, seeded and diced
1 TBS roughly chopped cilantro
Toss it in about half the dressing and then add a little bit until it has enough moisture.  I like to save the rest of the dressing to put on whatever greens I use to go under the salad.   Hope you enjoy this delicious, fresh way to ring in spring!


Sunday, March 3, 2013

Curry Chicken Salad

      Chicken Salad is a simple enough treat and done right it is a low fat, high protein snack.  This one is a twist on a southern favorite, Curry Chicken Salad.  Many people make this salad with cream cheese and sour cream or mayonnaise, but for our purposes we will use the ever versatile greek yogurt.  Also, for another cheat I used canned chicken.  It saves time, shreds nicely and has a good texture without being dry.  Otherwise I really like using grilled chicken thigh meat.  It's juicy, though a little higher in fat.
      Before you start mixing everything together lightly toast
1/2 cup slivered almonds
Let them cool as you mix all the other ingredients:
1- 12 oz can cooked chicken breast, drained
2 TBS Preserves (I like using mango chutney, but as I didn't have any I used apricot preserves.  Orange Marmalade works really well too)
1/4 cup finely chopped red onion
1 stalk celery, finely chopped
2 tsp Sweet Curry Powder- Penzey's  is my favorite place to get spices, they are usually salt free and extremely flavorful.  If you like a little more heat to yours try out any of the hotter varieties
1/4 tsp fresh grated ginger OR 1/2 tsp ground ginger powder
1/2 tsp salt
1/4 tsp fresh ground pepper
1/3 cup plain greek yogurt
2 TBS Mayonnaise   (I add the mayo for the mouth feel, but if you prefer just do 1/2 cup of greek yogurt)
and of course once your almonds are cooled add them in.  When you first mix it together it won't have much color, but as it sits it will get bright yellow from the tumeric in the curry powder. 
I like having it in lettuce wraps, or just scooped on crackers.  And it's really good with toasted coconut on top too. 

Krys- sorry this took so long to get up.  I've been working too much, as usual.  Love you!

Monday, February 18, 2013

Cowboy Steaks

      There are times in life when you just need a big hunk of meat.  For me it's not often, but when I want a steak I don't want a dinky little filet, fat is what makes steaks taste good and filets just don't have enough.  I do like my flank steak, but usually I prefer flank in something like tacos, and flat irons are popular, but they are so hard to judge the temperature. Porterhouse steaks are nice, but you are paying for bone just as much as for the meat, and you might as well just buy a strip.  For me, though, there are really only two kinds of steak I really love.  Both are PERFECT for this recipe.  I love Ribeyes, and actually I love sirloin.  Ribeyes to me are the perfect
 combination of meat marbled with delicious fat that makes for juicy flavorful awesomeness.  The sirloin is very flavorful (and a little more lean, if that is what you are looking for)  but for me it is more about the emotion it evokes than anything else.  When we were young my dad would bring a big slab of sirloin home, about 3lbs an inch and a half to two inches thick.  We would grill it up whole to a beautiful perfect medium rare then slice it for us all to share.  I really do feel that often the memory that food evokes does more for the meal than the flavors (remember Ego from Ratatoullie and how the perfect meal reminded him of mom?)
      So the message here is pick your favorite steak.  You want something big (because evidently all cowboys are from Texas and everyone knows that everything is bigger in Texas).  Usually I go with 16 oz or bigger.  First you are going to marinade it for at least 4 hours, and as long as overnight.  I put my marinades in a bag so that I can squeeze all the air out and have less liquid covering the meat.  Mix together
1/2 cup whiskey
1/2 cup salad oil
4 sprigs thyme
3 cloves garlic, crushed
1/4 onion, thinly sliced
1 TBS Salt
1 TBS cracked black pepper
put everything in a ziplock bag along with the steaks.  squish everything around so that the steaks are completely coated. After it has hung out for a bit and becomes super awesome you will need to start up your grill and make your rub.  The rub is a little bit of fun and inspired by ingredients that a cowboy might carry with them on the trail.  Spices like chili powder combined with herbs and coffee grinds- The coffee is important here, it really helps with the flavor.  I use my mortar and pestal and grind together
2 Tbs Coffee beans or grinds
1 tsp black peppercorns
1/2 tsp toasted cumin seeds
1 tsp dry thyme
 if you don't have a mortal and pestal a coffee grinder works great.  Once everything is finely ground add
2 Tbs kosher salt (or if you have it sea salt)
1 Tbs chili powder
1/4 tsp cayenne pepper
1 tsp smoked paprika
1 tsp garlic powder
1 Tbs  brown sugar
Remove the steaks from the marinade and rub them down with a good amount of your spices.  Next onto the grill!  Use something that will get a bit of smoke on the steaks.  If you have a charcoal grill they have all sorts of wood flavored charcoal.  If you are working with a gas grill get some wood chips (follow the directions on the bag) and make a smoke pouch to get that extra flavor.  I always prefer my steaks medium rare, but obviously cook it how you like.  Don't forget to let it rest before you cut into it so that you don't loose all the juices.  In the end you will have an extra delicious, extra awesome steak. 


Monday, January 28, 2013

Strawberry Champagne Salad

      Another recipe for Valentines. And another recipe borrowed from   my honey.  Traditional foods for the 14th always seem to be strawberries and champagne.  This recipe is fun because he uses actual champagne and not just champagne vinegar.  The Champagne adds just a little bit of effervescence to the dressing. Simple, light and refreshing, it's sure to please!
      Start by getting your ingredients together in a bowl to toss.
Arugula - a couple of handfuls (remember it's just for two) the arugula is spicy and isn't overly crunchy-  Because what we really want to hear at the dinner table for a romantic meal is the crunching of lettuce.  right?
Strawberries- I like a lot, about 1 cup of sliced strawberries.  Keep a few out on the side to top the salad with
Crumbled Gorgonzola - the distinct flavors in the blue cheese pair well with the strawberries and champagne and contrasts nicely with the spicy arugula.
Finally make the dressing- you will want to do this at the last minute so that you don't loose the bubbles, plus you might as well just put the bottle on the table.  In a small bowl whisk together
1/4 cup champagne vinegar
2 TBS honey
1/4 tsp pink peppercorns, ground
pinch salt
then slowly whisk in
1/2 cup salad oil and finish with
a splash champagne
drizzle a small amount into the salad and toss until well coated, adding more if you need it.  Build your salads up on plates so that they are nice and tall then top with a few more pieces of strawberry.  A great way to start a special meal, or any meal for that matter!

Sunday, January 27, 2013

Coleman Public House

Ahi Tuna Salad
      Got an evening off work, and to be honest I really didn't feel like cooking anything today.  I've just been far too tired.  Instead I went and saw Les Mis with my mother today and then we went out for "lunch" around 3 this afternoon.  We went to one of our haunts and as always had a lovely meal and a great time. 
      While I call it one of our "haunts" Coleman Public House isn't a place we go once a week, or even a month (although we would like to) we are usually just to busy to go out very often, but if you happen to be in Mount Pleasant and are looking for a laid back meal of absolutely delicious food it's a great place to check out.  According to my husband they have a great beer selection of local and international beers-- get a flight a great way to try some new beers.  Not to mention the bar is roomy for a nice gathering with friends. 

      The food, though, is what keeps bringing me back.   They have burgers and pizzas as well as some southern specialties.  But there is also a bit of Asian fusion on the menu.  The Asian Glazed Rib appetizer is always fabulous, and honestly I have yet to have anything there I didn't like.  Still I have my favorite.  The Fungi Burger.  I have a slight addiction to mushrooms and when you add truffle oil, caramelized onions and a beautiful medium rare burger, not to mention those garlic fries. . . well it's a little addictive. 
      So check it out.  Have some fun and eat some yummy food. 

Thursday, January 24, 2013

Warm Mushroom Croustini

      Before I started working on my menu for Valentines day at work I sat on the computer and googled aphrodisiacs.  Wanted to have a wonderful sensual meal planned for our customers.   I was amazed when I started looking to find that garlic was an aphrodisiac.  I mean, who wants to kiss someone that stinks like garlic?  It seems, though that garlic increases blood circulation and for thousands of years is has been known to be a stimulant.  So who cares is you smell a bit, I guess it doesn't matter if you both smell like garlic, right?
      This is a great little hors douvre to have while cooking your valentines dinner. I stole this recipe from my husband  (He is being ever so helpful this week!  Such a sweetie!)  Start with wild mushrooms.  Go to a natural market, they usually have a pretty good selection of bulk mushrooms.  Get a couple of different kinds- Chantrells and Morells are ideal, and my favorite, but if you can't find them, porchini, oyster mushrooms, beach mushrooms, enoki, and if all else fails, go with the old stand by of shitakes, portabella, and cremini.  Any mixture of these will do you well.  Get about 6 oz of mushrooms total, clean them gently and dry them.  If you get something with gills in it be sure to scrape them out and remove any woody stems.
      Next it's time to cook them.  In a large, heavy bottomed sautee pan on medium heat cook until the garlic begins to brown
3 TBS Olive Oil and
4 Garlic cloves, crushed with the flat of a knife blade
once they have started to brown add the mushrooms and coat with the oil.  Let them cook, stirring occasionally Then deglaze the pan with
1/4 cup white wine and season with
pinch salt
4 grinds of fresh peppercorns
Continue cooking until the mushrooms begin to dry When the mushrooms are mostly dry remove them from the heat and let cool. 
      While this is cooling, cut some slices of Baguette - Trader Joes sells a really delicious multi-grain demi-baguette works beautifully well for this recipe.  Do about 1/4 to 3/8 inch slices, 8-10 of them.  Drizzle with a little olive oil and season with salt and pepper on both sides.  Toast in the oven at 350 for about 5 or 6 minutes.  So they are still soft, but get a bit crispy on the edges.
    Once the mushrooms are cool chop them until they are about the size of your pinky nail. Then mix with
2 TBS maynoaise
1 Tbs Parmesan
1 tsp chopped Thyme
Pile the spread on top of the crustinis and place in the broiler for about 6 minutes.  Remove when it has begun to brown on top.  Serve warm.  MMMMM it's wonderful.  A great treat to feed to eachother.  So enjoy the sharing and be stinky together!    

Monday, January 21, 2013

Lobster Risotto

      Valentines is coming up, and wanted to share a few recipes for the more sensual nature in all of us.  This is the kind of recipe that I love to make with a glass of wine in hand and stolen kisses while hovering over the stove.  The lobster has a sweet, buttery taste that pairs wonderfully with the creamy, cheesy rice and of course a nice glass of wine.  This treat is a great way to celebrate your special someone any time of year!
      If you really want to get a whole lobster (or two) and take them apart, feel free, but for ease of preparation my suggestion is to get just the tails.  First clean them by clipping down softer underside of the tail and breaking them open.  Then you remove the meat and set it aside.  You are going to use the shells to make stock.  If you bought the whole lobsters I would suggest steaming them first (because dismembering live lobsters isn't my favorite thing to do) then cleaning the body out and using the legs, body and shells from the tails and claws to make the stock.  Put them in a pot with fresh herbs (Tarragon and thyme) a couple of sliced shallots and a few crushed garlic cloves.  Let simmer for at least 30 minutes.  Then strain it so that it will be ready to go when you need it for the risotto- keep it hot, makes the cooking process work better. You'll need to have about 1 Quart of Stock in the end.  If you run out toward the end of the process no one will know the difference if you finish it with a little water.
       Now the trick with risotto is that you are slowly cooking a starchy rice so that it releases it's starches and thickens the liquid making creamy little pearls of deliciousness.  First you will want to sweat
1 shallot, finely diced
2 garlic cloves, minced in
2 TBS olive oil
once the vegetables become translucent add
1 Cup arborio rice (some packages will say risotto rice) It is the short grain, high starch rice  that is traditionally used in a true Italian Risotto.  You will toast the rice in the oil just slightly to make sure it is completely coated as well as to get just a bit of browning on it.  Turn the heat down to medium and stir constantly so that you don't get any burnt bits.  Once it is slightly toasty deglaze the pan with
1/2 cup white wine .Remember you need to be drinking this too. Pick something that will pair well with the lobster, I like a sweeter wine myself like a Chinin Blanc or a Pinot Gris always pairs well with seafood, but talk to your wine guy at the local market, they are always helpful when it comes to picking out the prefect wine for your event. 
      Once the wine has cooked down a bit you are going to start adding stock.  The proper thing to do it to ladle little bits (about 4 oz at a time) of HOT stock into your risotto.  So stir, reduce, ladle, stir, reduce, ladle and stir some more.  Keep up this process until the rice is cooked through (have a taste, it's ok)  Then add one last ladle of the stock and
Chopped Lobster meat- Whatever you have used, so either the tail meat, or whole lobster, maybe save the claw meat to garnish.  Honestly I'm not going to give you any amounts on the actual lobster, use as much as you have, if you have more meat in it, there is more meat, and you are not going to change the consistency of the rice that way, so you don't have to worry about it.  The flavor of the lobster comes more from the stock itself than from actual chunks of lobster meat in the rice. 
      To finish the risotto you add cheese, butter and herbs.  I like to get wedges of cheese to grate myself.  A micro plane works really well for this because you end up with cheese that looks a bit like snow and it melts evenly and quickly into the risotto.  So stir in
2 oz parmesan reggiano snow
2 oz marscapone
1 TBS butter and
1 TBS chopped tarragon and thyme
don't forget to season with salt and pepper, serve and share the love! This dish easily works as a centerpiece to your meal with a nice fresh salad and some crusty artisan bread, or you can use it as a side with a steak to make your love some surf and turf.  (You know, send him out to grill while you make the risotto).  Hope you enjoy and have fun.


Monday, January 14, 2013

What does washing dishes have to do with it?

      In 2004 I finished my freshman year at Appalachian State.  Like many kids I was on my own (truly) for the first time living on my own with no structure to my days and no money.  I got two jobs that summer.  The first was at a coffee shop where I learned the hard way about people that will take advantage of you whenever you give them the opportunity.  It's a hard lesson to learn at 19, and I still find myself forgetting it, because I WANT people to be good and kind.  I want to give them the opportunity.    The second job, though, that was a real game changer.  I was thinking tonight about how much different my life would have been had it not been for one man who let me wash dishes.
      I get it, you are probably thinking, "What does washing dishes have to do with it?" right?  Well come to find out everything.  That day I went into Outback to apply for a job as a server.  Why a server? Well because women don't cook in professional kitchens- that's painfully obvious from all the grungy, ill-mannered, inappropriate boys out there cooking our food every day.  Most of the boys in that kitchen were certainly of that quality, and I didn't want to be a prep cook, not really.  I wanted to be a "real cook", but girls just don't to that . . .
      So my friend and I went in to apply, he was going to work in the kitchen, because Matt claims (and is probably a little right) not to be a people person.  After applications were filled out a manager came over and asked what position I was applying for.  "A server. . . I guess" And bless you Trevor, you asked why "I guess" was part of my response.  After explaining my trepidation you said that everyone starts in the kitchen washing dishes and I wouldn't be any different.  So wash dishes I did.  I washed those dishes for 3 months.  And during those 3 months I watched and I learned. 
      I learned that boys in the kitchen are rude, and have very dirty minds (not all of them, some are gentlemen with dirty minds that know when to keep their mouth shut) I learned the quickest way to scrub potatoes, and I got a good workout from punching potatoes through the fry cutter.  I found out that if you soak onions in ice water they don't sting your eyes quite so much when you have to peel and cut them, though mostly I just got used to having to do it.  I learned that if you have to peel more than 5 carrots you need to wear gloves, or your hands will be orange for at least a day.  During that time my hands got really pruney and I ruined a couple of pairs of shoes. Before I learned about kitchen Birkenstocks which you can pull the insoles out of and run through the dishwasher to get the gunk out of the bottom.
      All of these things and the things that I have forgotten I learned or forgotten to mention sometimes feel way more important than the things I learned when I went to culinary school.  The 3 (or so) years I spent at Outback really changed my life.  It was tough.  I had to fight my way up the ladder, but I was lucky I had friends to catch me as I started to slip.  I had to prove myself time and time again way more than any of the guys had to.  I trained myself on the next station because it seemed that if I went to the boss without already knowing it he just couldn't believe that I (a girl!) would want to do more than salads.  Making blooming onions is dirty work, and working the sautee station is hot, and you get burned a lot. Though by the time I was to be trained to work the grill and middle they had figured out that I was able and willing to do anything and they let me do it. 
      During this time, though, I was still in school, studying music, loving every moment of that as well.  I can't help but think, though, what if he had made me a hostess, what if I had been serving tables?  Would I have kept it up, would I have wanted to be in the Kitchen in the end, wanted to be a Chef?  Would I even have the same dreams I have today, be the same person?  I daresay I would not.  Maybe I would be at a Church somewhere as a choir director.  Maybe I would have practiced piano a little harder, and been actually useful playing the darn thing.  Maybe you would know my name off NPR, and maybe you would have one of my CDs on your shelf.  I doubt it, honestly. There would be no plans for a restaurant.  No menus stirring around in my head.  No floor plans drawn up, and certantly no lists of little things to make a space more comfortable and easier to run.  In the end I need to say Thank you. 
      Thank you to all those people in that kitchen, in that restaurant on the side of that mountain that didn't say no when I asked for something more than the status quo.  When I worked there I didn't learn to be a great Chef (I still don't consider myself to be one) but I learned what it is to be a cook.  It's something they can't teach you in culinary school.  Knowing all the sauces, fancy techniques, all the french words for things can never prepare you for what's happening out there in a world, as Anthony Bordain claims, is full of pirates.  Where we (yes I have become one of those oft grungy, dirty minded "guys") know we are part of a team, but you still have to look out for yourself  and sleep with one eye open.  Where you are as comfortable with a blade in your hand as most are with their cell phones or cup of Starbucks and even if you don't smoke there is always a lighter (or torch) near at hand. 
      It's not a world for the feint at heart, but in the end I wouldn't trade it for anything.  I wish I could thank each one of those guys who pulled me aside and told me some trick, some life lesson about what it is to be a cook.  I wish I could thank them for not taking it easy on me.  I do wish there were some dirty jokes I could unlearn, and I wish that everyone didn't describe basil chiffinode by starting with, "roll the basil up as if you are rolling a joint", but that's the world I live in. And I wouldn't have it any other way.  

Sunday, January 6, 2013

On being Chef

      Sorry I've been away for so long.  I tried to do some posts for you over the Christmas holiday, but I think I burnt myself out a little bit with all of the Thanksgiving fixins.  Of course it also hasn't helped that I've been working 70 hour weeks, and when I get home I just don't have the energy to do any more cooking.  Many new things in my life that I am adjusting to and lots and lots to learn!
      I have been amazed to find out many things about myself in the past few weeks as well as about how to deal with other people.  What I have learned the least about (so far anyway) is food.  I hope that I will get back to more playing and learning about my food, but for now I am content with the endless discoveries of being a MANAGER.  That word has always scared me.  I feel like I don't know how to balance the time I need to spend on the phone, in the office, on the computer etc, with the time I want to spend in the kitchen with my people and with my hands on the food.
      There is a little list of things I'm developing to keep in mind for the future so that I can run a sucessful business.
#1- I must, absolutely must hire someone to be the general manager of my restaurant.  I just want to be in charge of the food! I need someone to tell me that I am not allowed to spend money just because I want something. 
#2- I cannot be the only person there who knows how to do everything.  I honestly don't care if every single person there has the ability to do everything when I am away, I have no NEED to be physically there, I enjoy being in my kitchen playing with food, but I hope that I can hire people that are just as passionate and intelligent as I am (or more so, that would be helpful too). Which leads me to
#3- I must schedule days off for myself.  and with this in mind I need to acquire myself a sail boat, or some other method for occupying my time that does not involve a TV, computer, telephone or stove. 
#4- People want to be trusted.  One of the most interesting things about my new position is that I have people working under me that have been at the restaurant for YEARS longer than I have.  What has stuck out the most for me is that these people don't resent that I was given the position over them even though they have been there longer or are older.  I am sure some of that is simply the desire not to have the stress, but I hope that it is also the fact that I make an effort to ask their opinions and take what they say into account.  To be honest I would not be able to operate the restaurant at the level I am now without each of my employees knowledge, trust and patience.
      It's just the beginning, but I'll tell you what, while I am exhausted most of the time, and even in my beautiful Danskos my feet are killing me at the end of the day, I LOVE, love, love, LOVE running a restaurant.  I love the feeling I get when people say "this was absolutely delicious, the best _____ I've ever had" or "Thank you so much for accommodating my allergy/diet." and my favorite this week was after a customer asked if they could talk to the Chef hearing them say. "But you're so young . . . and so strong.  Next time we are coming in we are bringing you a bottle of wine."  Yes, they are coming back, and bringing wine :) .
       So I just wanted you all to know where I've been and why I've been ignoring my blog a bit more than usual.  I'll get started up again soon, now that things are settling into a bit of a routine at work.  Please let me know if there's anything you want to know more about, or how to make, or just why you can't make something work.  I'm getting a little low on ideas for the moment, and input is ALWAYS appreciated.
LOVE YOU ALL!!!!!

Monday, December 17, 2012

Nog

      Alright kiddos, lots going on.  First I want to apologize for not having many posts lately, I've been busy with a promotion!!! Got a real life Chef position, no longer just a humble cook- the difference being all about responsibility and goodness knows, there is plenty to do! None the less, tt's Christmas time and everyone is crazy busy:  decorating, shopping, chauffeuring kids to and from the many holiday concerts/parties/parades, going to see Santa at the mall, picking up family from the airport.  It's a busy time of year, so my suggestion, take some time and indulge yourself.  IT'S WORTH IT! 
      I have actually spent most of my life disliking Egg Nog.  I've always been willing to drink it, but never really enjoyed it, because honestly I had never had the home made stuff.  It is way better than anything you will get from the store.  I'm not going to lie to you and pretend it's super easy to make.  It is very similar to making ice cream base, and in fact, if I find I've made too much and just can't drink it all (this has never happened) I will just throw it into my ice cream machine and voila, egg nog ice cream! So prepare yourself for a bit of a workout (or choose to use an electric hand mixer) and let's get started. 
      This recipe will make about 6 quarts of nog, give or take.  First you will need to separate eggs. You must do this carefully, because later you will want to be able to whip the whites to fold into the mixture.  When I am separating eggs for something like this I have 2 bowls and a mug.  I separate the whites into the mug one at a time then put the yolk in one bowl and after checking that there are no little stray bits of yolk in the mug that goes into the bowl too.  This makes it so you don't contaminate all the whites with one broken yolk.  Separate a total of
8 eggs (yolks separate from whites)
go ahead and leave the whites out, they separate easier cold, and whip up better at room temperature.  Once you have all the eggs separated get a large pot on the stove on high.  In a dry pan lightly toast
2 Green Cardamon Pods (not a necessary flavor, but man it is good in there)
2 cloves
3 allspice seeds and
a cinnamon stick toss them around in your hot pan for 30 seconds or so, just until they become lovely and fragrant. Then add
1 quart Cream  don't cheat and try to substitute milk or half and half here, suck it up and use the cream, otherwise you won't get the texture you want (i.e. rich and awesome) and
1/2 vanilla bean scraped (or use 1 tsp vanilla extract)
Now turn the heat down to medium and bring it up just to a simmer.  While you are waiting for this to happen you are going to whisk the egg yolks with
1 cup sugar
      When you are working with yolks and sugar there are a couple of things to keep in mind.  Don't ever put the sugar into the yolks and just leave them, immediately mix them, otherwise you will get lumpy bits that just won't come out.  So get a large pot of water simmering to put the bowl over to begin cooking the eggs.  When you are whisking the two together you are trying to pump air into the mixture, so as you mix them it will lighten up and then it will thicken up, this is exactly what you want to happen.  It doesn't need to whip to peaks like you will do with whites, but it will be creamy and thick enough so that if you drizzle some over the top of it with your whisk it will take 4-5 seconds to dissapate back into the mixture.  And remember while you are doing this to keep an eye on the cream mixture, don't want it to boil over!
      Once you have your five second ribbon (that's the fancy term for what I just described) and your cream is nice and hot slowly whisk the hot cream into the egg mixture, using a ladle and going a little at a time so you don't cook the egg by adding the hot liquid to fast.  We call this tempering the egg mixture.  Once all the liquid is in put the bowl back over your hot water bath and keep mixing, being sure to scrape the sides on a regular basis, you are still in danger of scrambling those eggs.  While you are letting the egg cook set yourself up an ice bath.  I like using two large bowls so that there is a good bit of surface area touching the ice so it cools faster.  So ice in the bigger bottom bowl with a little bit of water and salt and then another bowl on top.  Keep stirring your egg mixture until it thickens up, It will be pretty frothy on top so be sure you are judging it from the liquid underneath.  Should be thick enough to lightly coat the back of a spoon.  When it is ready take it off the heat and pour through a strainer into your prepared ice bath. It's a lot easier to strain while hot!
      For those of you more experienced with this kind of thing you might not want to use the second hot water bath, I don't.  I just put in on the stove directly in a pan on medium heat, and cook it while whisking CONSTANTLY until it comes about to a boil.  This is dangerous because it is much more likely to curdle and break, and you really don't want to risk all of your hard work.  My advise, unless you are really comfortable with it, use the hot water bath.  So much safer!
      Once this has cooled down it is time to whip your whites.  You don't need all of them (maybe save the rest for a healthy egg while omelet, you'll probably need it after the nog) use
4 whites, about 1/2 cup
 1/2 tsp cream of tartar
I use a stand mixer for this part, because my arm is usually pretty sore by this point.  Mix the eggs until they have stiff but not dry peaks.   Fold this into your cooled egg and cream mixture.   It will be thick and sinfully smooth.  Don't worry too much if you feel like it's too thick, it thins out when you add the booze. 
     If you are having a party go ahead and mix the alcohol right in, or keep it separate and mix as you go if it's a treat just for you.  I've seen people use all kinds of different things for this, most common I think is brandy (I made pear brandy just for this purpose), but I have seen people use 151, whiskey and bourbon.  It really all depends on your taste. 
      So this is my little holiday treat, I hope I didn't scare you off, because it is so worth taking the time to make it for yourself.  Enjoy and HAPPY HOLIDAYS!!!!

Saturday, December 8, 2012

Almond Joy No Bake Cookies

      This week has been a bit hectic, some big changes at work and a big order for desserts.  I've been baking all morning, and getting pound cakes in at night-- three of them so far.  One of the little treats I've done for this project are some coconut almond no bake cookies. 
      This recipe was adapted from the chocolate oatmeal cookies we've been making around the house for as long as I can remember.  Part of what made those cookies were so addictive was that they are quick and easy to make and we almost always had the ingredients around.  I've been playing around with substituting coconut for the oatmeal and finally decided that to be safe (because I have been having trouble finding gluten free quick oats) that I wanted to pull the oatmeal completely out of the recipe.  So this is what I ended up with. 
      Start by laying out some parchment paper, to drop the cookies on when they are finished.  Then melt
1 cup butter mix in
2 cups sugar
1/2 cup milk
3 TBS coco powder
Bring this to a boil and set your timer for 3 minutes.  Turn it down to medium high and let it continue to boil.  While all of this is going on measure out
2 1/2 Cups Coconut
1 Cup sliced almonds
and put asideWhen your 3 minutes is up remove from the heat and stir in
1 Tsp Vanilla and the coconut and almonds.  Quickly scoop it out into individual cookies onto your parchment paper.  You can use two spoons, that's what we always did as kids, or you can use a small ice cream disher.  Move quickly, they cool and firm up farily quickly.  Once they are dropped allow them to cool for at least a half an hour, or you could just eat them all hot and gooey, and try not to burn your fingers. 

Sunday, November 25, 2012

Mexican Hot Chocolate, well any Hot Chocolate for that matter . . .

      How many times have you had a bad day and just wanted a cup of hot chocolate when you came home only to be disappointed by those little powder packets, even the ones with the marshmallows?  Even worse, get home and realize that you don't even have your hot chocolate packets.  Now if you do any baking on a regular basis, you should have everything you need for some delicious home made hot chocolate.  This post though isn't just about home made hot chocolate, this is about my specialty Mexican Hot Chocolate.  Mexican Hot Chocolate is special because it has chili powder in it.  The spice adds a very lovely richness and depth to the chocolate that I find quite addictive. 
      This recipe is just for one cup.  Start in a pan by heating
1/4 cup milk.  When it gets that little film on top, but hasn't quite come to a boil whisk in
1/4 cup semi sweet chocolate chips (if you use dark add just a bit more sugar in the next step)
1 tsp sugar
1/4 tsp vanilla
pinch salt. The next three ingredients are what make it "Mexican" if you leave them out you will have a traditional hot chocolate
add a dash each of- cayenne, chili powder, cinnamon
Basically at this point you've made chocolate ganache, but you want to do this step first to make sure it is smoothly mixed.  You will need to add more milk to thin it out so add
1/2 cup milk to the chocolate mixture and bring it back to a simmer, mixing everything so it doesn't burn on the bottom.  Top with whipped cream or marshmallows and enjoy!   Promise, one of the best hot chocolates you will ever have, it's rich, flavorful and best of all can be made from things you already have in your pantry.  Enjoy!

Friday, November 23, 2012

Pear Brandy

      Today, on Black Friday, as many of you were up early waiting in line for the best sales of the season, I was curled up warm in my bed thinking about my plans for Christmas.  I was thinking about oysters and collards, roast beef, a very interesting version of gratin potatoes, about snacks and candies and what I'm going to put into those treat boxes I make every year.  Then this morning, as I sat and ate some leftover turkey and stuffing for breakfast a decision was made:  Today I am getting pear brandy started. 
      I've been thinking about pear brandy for a couple weeks now, actually.  Back in Oregon they had this lovely local brandy that we would use for our egg nog (the nog is special too, but will have to come in a later post, as I want my brandy for it).  I've been doing some research and I certainty don't want to make brandy.  I'm not entirely certain it's legal, and I just don't have the time or patience for it, so next best thing, we'll infuse it.  This is a two step process, but is pretty simple.  For the first step you will need 2 things
12 oz Brandy, I found a white brandy distilled from grapes, it will be prettier in the end than a brown brandy.  The white will develop a bit of a tawny color as the pear steeps that will look very nice as you bottle it. 
1 Pear, peeled, cut in halves and cored
Pour the Brandy over the pear and put into a sealed container.  Put it on the shelf for at least week or two and let that flavor infuse.  The next step will sweeten it to make it more like a liquor.  You are going to add pear simple syrup to the mix
1 cup Sugar
1 cup Water
another Pear, peeled, cored and sliced
1 vanilla bean ( or cinnamon stick, maybe some ginger)

      Heat these together, stirring until the sugar dissolves.  Bring the pot to a boil then remove from the heat.  Let the mixture cool at room temperature.  Add the cooled mixture to the brandy and let it steep for another 3-4 days.  Strain through a coffee filter to get all the little particles of pear out.  Store up to two months.  Here is a great website if you are looking for ways to bottle some for gifts.  Use it in Nog, mix it with champagne, or cider, use it to enhance wine and add some sliced fruit for a sangria.  remember to save the pears you strain out of the brandy, they will make a great addition to a dessert, or to add to that sangria!
      Hope you enjoy this little treat as much as I do, and I'll post more pictures as my process gets further along.  Enjoy, and have a safe and merry holiday season!


UPDATE 12/16/12
Just wanted you all to know that I lied, I thought (after making some apple cider vodka) that the pear would turn the brandy brown, but failed to remember that the vodka had a cinnamon stick which made the whole concoction brown.  But have no fear, after finishing it tonight, even though it isn't that beautiful tawny color I was talking about, it is still delicious and amazing in my egg nog.  Also, just to warn you, it is very dangerous because it is wonderfully smooth and it doesn't really taste like booze.  MMMMM, so good!

Sunday, November 18, 2012

Tasty, Tasty Thanksgiving Beverages

      I know I said I was done posting for Thanksgiving, but I think this one last post before the big day will make for a fun holiday.  We've got the Turkey and all the trimmings, but what we are missing is that last little flair: cocktails for our Thanksgiving party.
      I am pretty strict about keeping my holiday's separate.  I don't like celebrating Christmas until it is actually that time of year.  To be truthful I'm a true believer that Christmas doesn't start until Christmas day, but that is a bit beside the point.  There are things that I like saving for Christmas.  Egg nog is always foremost in my mind for Christmas cocktails, hot buttered rum and of course Wassail  (I mean there's a song for that one).  So I've spend the week thinking about Thanksgiving cocktails.
      The first is a play on that sandwich that you make, you know the one with the stuffing, turkey and cranberry sauce . . .  a Sage Pomegranate Martini.  Sage is the foremost herb in my stuffing and while I could have gone with cranberry here, I thought that the pomegranate would be a nice change, plus I always remember thanksgiving at my uncle's farm getting the pomegranates straight off the tree (or ground) and sharing it with my family.
      There are a few basic tools one needs to make this cocktail: a shaker- any kind will work, and a muddler- basically a small baseball bat.  Start by making your rim garnish-
1/2 cup sugar
1 tsp pomegranate juice
Just mix them together.  It should be fairly dry, and slightly pink.  If you have a glass rimmer put your sugar in it and press to the rim of your martini glass.  Now in your shaker muddle (smash up with the mini bat)
2 sage leaves
1 TBS sugar then add
2 oz vodka
2 oz pomegranate juice
3 cubes ice
shake and strain into the glass. Garnish with a sage leaf and if you have them a few pomegranate seeds. If it's too much vodka for you I actually will sometimes water it down, I find when I do that you can get more of the sage, because it's not being overpowered by the vodka and pomegranate. 
      The next drink is a punch.  You can make a pitcher of it to share, or you can make it to the glass, either way you are left with a beautiful spicy fall beverage.  It's a simple drink, just 3 ingredients, and some apple for garnish if you like, but quality ingredients always make it better.  This time of year you can always find fresh squeezed apple cider, you are not so much looking for the spiced stuff, although if it's what you have it won't mess up the drink, what you want is the stuff that still a bit cloudy, you know like the kind you find at a farmer's market.  As ginger-ale goes getting a micro-brewed ginger-ale will often get you something that has a little more spicy kick to it.  Down here in South Carolina we get Blenheims Ginger-ale which comes in a mild or a spicy.  The spicy is actually a little too much for me, but if you like that kick, go for it.  Of course you have to remember that the cinnamon whiskey kicks it up a notch as well. 
Spicy Apple Punch

For a Pitcher:
For a Glass:
1 quart Apple Cider
½ cup Apple Cider
1 quart Ginger Ale
½ cup Ginger Ale
8 oz Fireball
1 oz Fireball

       So that's about it, share your little fall treats and well . . . drink responsibly.  Yea I know, I feel like I had to say it.   

Thursday, November 15, 2012

Planning for the big day

      If you've never planned a big meal sometimes things can become a bit overwhelming when it comes down to getting the food on the table.   Without planning things are forgotten, you begin to stress out and are worrying too much about getting the food to the table to enjoy your celebration.  I've been working on this Thanksgiving menu now for two weeks.  With just seven days left till the big day, it's time to get started with planning and making sure everything is perfect for your celebration.  So first things first, a reminder of the menu. 

Pear Ginger Tart


      Since most turkeys these days come frozen you will want to be sure you are buying 4-5 days in advance, so that they will have ample time to thaw.  When you are buying turkey you can go ahead and purchase any items that will survive hanging out for a few days (Don't forget to clean out the fridge so you have space for everything!).  The less time you ahve to spend shopping the day before the big event the better! So here is your list:

Turkey
Turkey Necks
Bacon
Sausage
Onion
Carrots
Celery
Fennel
Butternut
leek
Brussel Sprouts
Shallot
tarragon
Pears
Pink Lady Apples
Fresh Ginger
Cranberries
Tangerines
Cinnamon Sticks
Star Anise
Herb De Provence
Grits
Check flour and sugar
Chinese 5 Spice
Maple Syrup
Champagne Vinegar
Pumpkin Puree
Chicken Broth
Honey
Dijon
Pecans
Cheddar
Cream Cheese
Goat Cheese
Butter
Bread
Ginger Snaps


      Once you have this first round of shopping done you can start preparing individual items;  Get your turkey thawing, candy pecans, Dice and Toast bread, clean brussles.  All of these things can be done several days before hand.  Take your time, do one or two things a day, so that come Tuesday you have these little things out of the way.  Also take some time to plan what dishes you will be serving each dish in, make sure you have enough of everything and that they are the right size and will hold what you need.  If it comes down to it on Thursday there's no place to go to get more. 
      On Tuesday start your next phase of prep.  Dice vegetables for stuffing, sprouts, grits, squash and to roast with the turkey and shave the fennel for your salad.  Save all the bits and scraps (peelings are even ok, just wash your veggies before you start cutting them) for your stock- don't worry about butternut or brussle sprout scraps, they won't make it more tasty.Go ahead and make your salad dressing today too, just be sure you make enough because once you make it you'll be eating it till the big day!
      Wednesday you'll have to go back to the store for those last few things. 
Salad Greens
Fresh Thyme
Fresh Sage
Bay Leaves
Cream
Some flowers (or those pretty branches, something . . . ) for the table
Wine/Beer/Cider
In and out! This might be a good job to send the hubby and the kids to get them out from underfoot for a bit.  
      Make your Cheesecake and your Tart.  While that is baking get your grits started in the crock pot and get water going for your butternut to blanch, just blanch it today, no need for the rest unless you really want to. Clean your turkey, brine it and make stock.  Don't forget to throw in those extra turkey necks you got and all those lovely vegetable scraps. If you want once the stock is ready to go feel free to make your stuffing or leave it for the next day, you are actually getting close to being done!
      Thanksgiving day-  take the morning make your table pretty.  Make sure the boys have their beer chilling (maybe some for you too) and wines are stored at their appropriate temperatures.  4 hours before dinner get the turkey ready to go, and make sure you have calculated your time correctly and know when it is going in the oven.  Get your stuffing mixed and finish up the squash.  Set those aside they will go in the oven about 40 minutes before time to eat.  On the stove top you will be working on sprouts, grits, and cranberry sauce.  These can all be started about an hour before time to eat and will mostly cook themselves, you just got to keep those grits from burning.  
      As things start going in the oven at the end (one of the reasons I like doing a split turkey is that it is short and you can still use both of your shelves) make sure the table is set, and you have places for all the people as well as food.  Pull the Turkey 10 minutes before time to eat and make gravy while someone is making sure everything gets into the proper dish.  At the last moment put together the salad so that the dressing doesn't make it all wilty, it should be the second to last thing on the table since the Turkey always comes at the end.  As the last of the dinner items come out of the oven turn it off and slide your tart back in so it's ready for dessert. 
      I hope that each and every one of you gets to enjoy a beautiful holiday full of family, friends, good food, and love because we all have so much to be thankful for.